为了代码规范,最近在公司私有Gitlab仓库中增加了CI集成,用于代码风格检测和单元测试,如果不符合某些硬性条件,那么你是没有办法创建MergeRequest的,这样就能对代码质量有一定的保障,也能让代码风格保持相对一致。
下载可执行文件
具体也可以参考官网教程 https://docs.gitlab.com/runner/#install-gitlab-runner,里面介绍了如何在Linux, Mac, Wundows, Docker, Kuberbetes中进行安装。
# Linux x86-64 64位系统选择此项
sudo wget -O /usr/local/bin/gitlab-runner https://gitlab-runner-downloads.s3.amazonaws.com/latest/binaries/gitlab-runner-linux-amd64

# Linux x86  32位系统选择此项
sudo wget -O /usr/local/bin/gitlab-runner https://gitlab-runner-downloads.s3.amazonaws.com/latest/binaries/gitlab-runner-linux-386

# 增加文件执行权限
sudo chmod +x /usr/local/bin/gitlab-runner
执行下面命令验证安装结果
gitlab-runner -h
增加CI用户用于执行任务
# 增加名为gitlab-runner的用户 会同时创建家目录 /home/gitlab-runner
sudo useradd --comment 'GitLab Runner' --create-home gitlab-runner --shell /bin/bash
安装和启动
# 指定运行用户和运行文件夹
sudo gitlab-runner install --user=gitlab-runner --working-directory=/home/gitlab-runner
# 开始runner
sudo gitlab-runner start
向Gitlab注册该Runner
各个系统注册方式可能稍有不同,也可以参考官方文档 https://docs.gitlab.com/runner/register/,里面有关于Linux,Mac,Windows的相关操作。
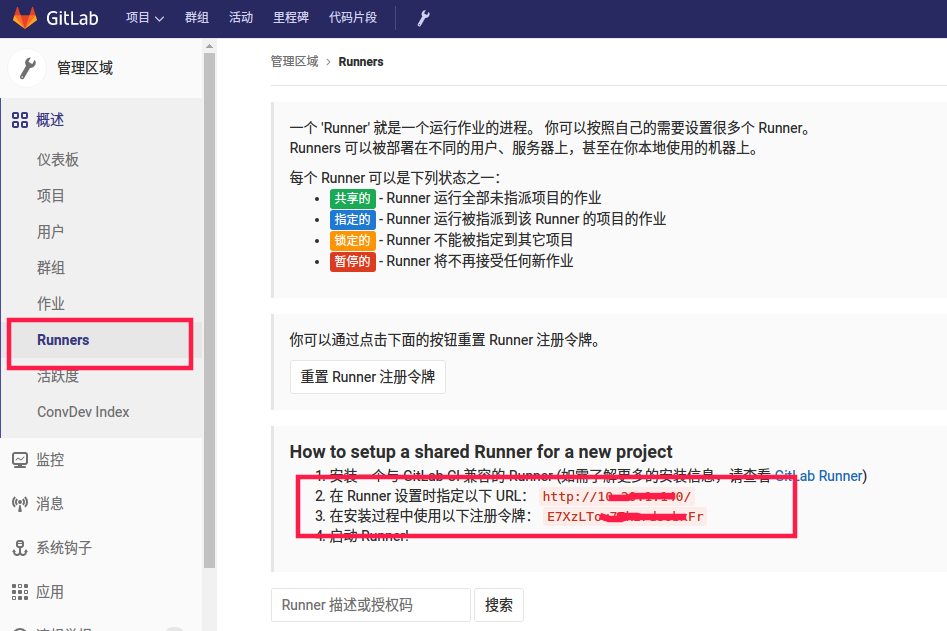
1、执行该步骤之前,要从Gitlab中获取相关认证信息,以管理员身份登陆,跳到后台设置页面

2、Runner设置,找到下图中的注册URL和注册令牌
3、开始注册流程
# 进行注册
sudo gitlab-runner register
执行完上面命令后,会交互式的让你输入相关信息,如下操作
Running in system-mode.

#  1、输入上图中的注册URL
Please enter the gitlab-ci coordinator URL (e.g. https://gitlab.com/):
http://10.20.99.111/

# 2、输入上图中的注册令牌
Please enter the gitlab-ci token for this runner:
xxxxxxxxxx

# 3、输入描述 如 another runner
Please enter the gitlab-ci description for this runner:
[gitlab]:another runner

# 4、输入Runner的tag 多个的话逗号隔开
Please enter the gitlab-ci tags for this runner (comma separated):
my-tag

# 5、未设置tag的能否运行 直接Enter,默认false即可
Whether to run untagged builds [true/false]:
[false]:

# 6、是否锁定Runner到当前项目 直接Enter 默认true即可
Whether to lock the Runner to current project [true/false]:
[true]:

# 7、选择执行类型 输入shell即可
Registering runner... succeeded                     runner=E7XAAAAA
Please enter the executor: docker+machine, docker-ssh, parallels, shell, ssh, virtualbox, docker-ssh+machine, kubernetes, docker:
shell


Runner registered successfully. Feel free to start it, but if it's running already the config should be automatically reloaded!
4、完成注册之后,刷新刚才的Runner设置页面,即可看到新注册的Runner已经准备就绪了。

设置Gitlab CI集成
gitlab CI默认已经被打开,在你的代码库根目录增加名为
.gitlab-ci.yml的文件即可。该文件中可以指定运行时各种操作,详情可以参考官方文档 https://docs.gitlab.com/ce/ci/quick_start/README.html。注意一点,该文件执行时的所在目录可以看作是代码根目录。
以最简单的PHP语法检测为例,对应.gitlab-ci.yml文件如下:
# 开始运行之前的操作
before_script:
  - echo 'runner begin'

# 增加名为php-syn-check的任务
php-syn-check:
  tags: # 指定使用有 my-tag 标签的runner运行该任务
    - my-tag
  script: # 任务运行的命令,原理是遍历所有php文件,依次执行 php -l进行语法检测
  - for i in `find ./ -type f -name '*.php'|grep -v vendor`;do php -l $i;error_code=$?;if [ $error_code != 0 ]; then;exit $error_code;fi;done;
.gitlab-ci.yml文件中保留的关键字列表,这些是不能被设置成任务名的。
| 关键字 | 是否必须 | 描述 |
|---|---|---|
| image | 否 | 用于docker镜像 |
| services | 否 | 用于docker服务 |
| stages | 否 | 定义构建阶段 |
| types | 否 | stages的别名(已废除) |
| before_script | 否 | 定义在每个job之前运行的命令(如环境初始化) |
| after_script | 否 | 定义在每个job之后运行的命令(如临时文件的删除) |
| variable | 否 | 定义构建变量 |
| cache | 否 | 定义一组文件列表,可在后续运行中使用 |
查看CI集成结果
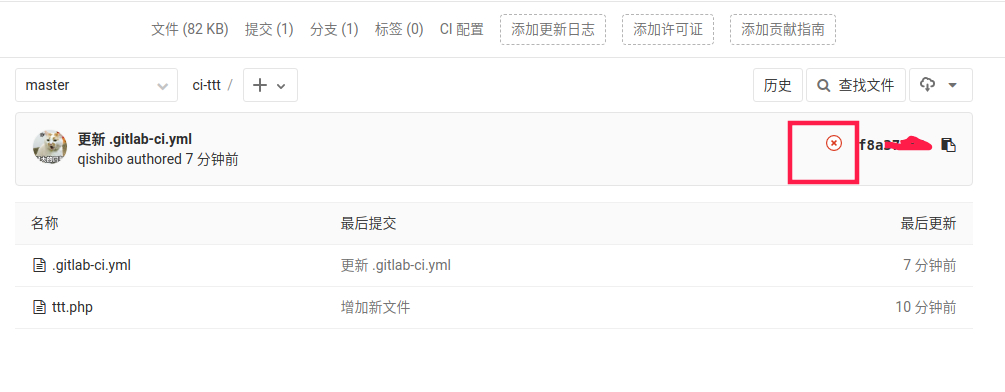
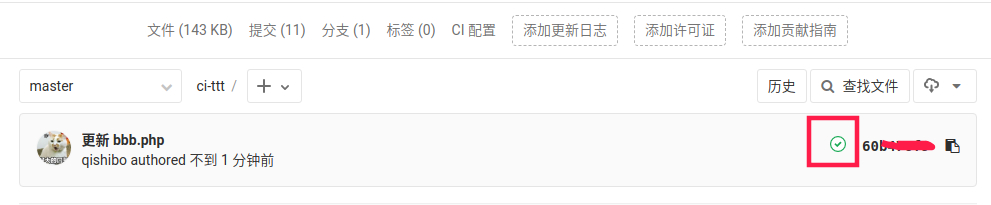
将上述文件提交到版本库,在提交页面即可看到CI运行状态,
初次运行的时候可能会不通过,原因是因为运行Runner的机器没有安装PHP,所以无法执行php -l命令,解决方法是在Runner所在机器上安装php即可,即sudo apt install -y php7.0-cli:
1、未通过CI集成时,点击方框部分进入详情
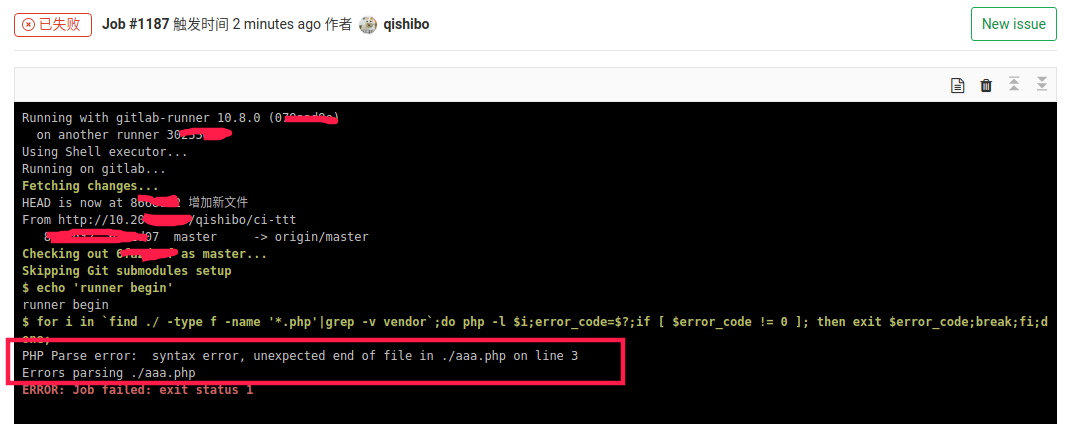
点击任务名
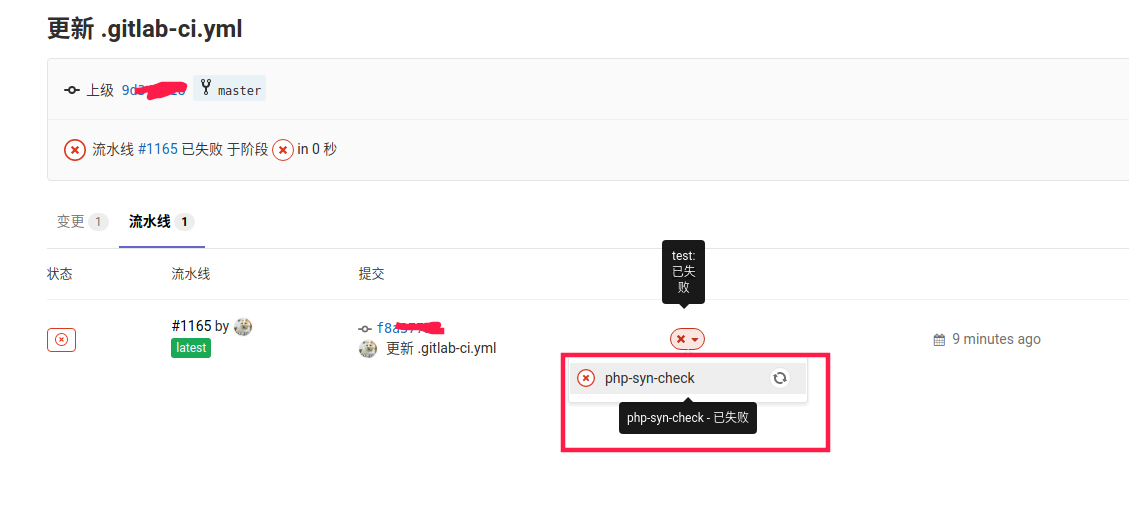
即可看到任务失败详情,是由于某个php文件有语法错误导致的
修复有语法问题的php文件后,再次提交,可以看到CI通过
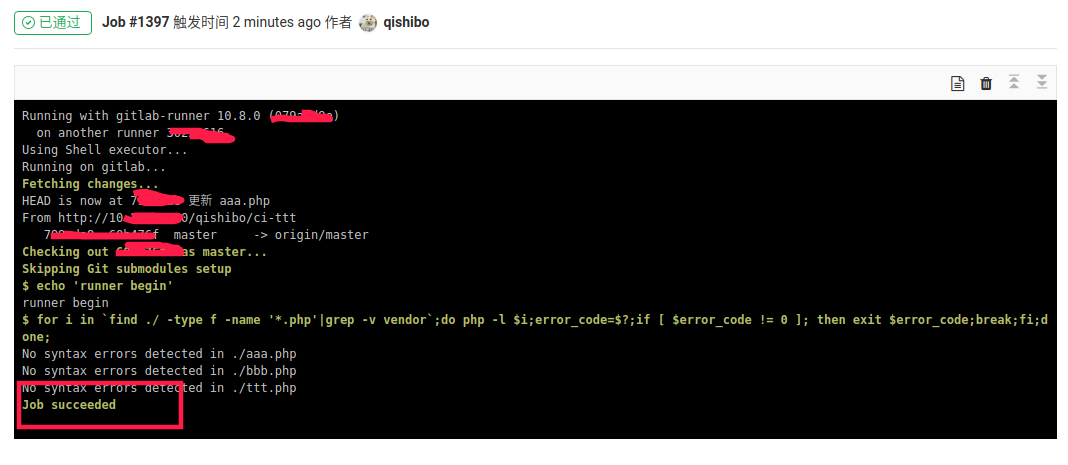
点击详情查看,看到php语法检测已通过,会有Job succeeded字样
至此,最基本的CI集成过程已经完成,如果想编写适合自己开发情景的配置文件,请参考官网文档 https://docs.gitlab.com/ce/ci/yaml/README.html, 会更加具体的介绍如何编写.gitlab-ci.yml文件